Introduction
This guide is part of the Kubernetes the hard way on bare metal/VMs
series. On its own this may be useful to you however since it’s
tailored for the series, it may not be completely suited to your needs.
This
guide is to help people set up and configure a basic Ubuntu server from
start to finish. It will go into quite a bit of detail including
software RAID and LVM and as such if you don’t have at least 2 disks
available then you may not be able to follow along exactly; that doesn’t
mean you can’t follow along though!
I’m going to presume you have a physical PC/server or virtual machine on which you wish to install Ubuntu.
If you’re using a physical machine then you’ll need to download the ISO
and put it onto a USB stick or CD so that you can install Ubuntu. There
are plenty of guides online on how you can achieve this; however two
quick examples for USB sticks are:
- Linux: Run in a terminal
sudo dd if=/path/to/ubuntu.iso of=/dev/USB_Device - Windows: You can use PenDrive Linux
If
you’re using Virtualbox or libvirt/KVM/QEMU then you can just attach
the ISO directly to the VM. If you’re not sure about how this is done
then take a look at my tutorials on how to use them.
libvirt/QEMU/KVM
Virtualbox
Resources
See the main series under Setting up the resources for the VM specs


Location and Keyboard
Select your language and the location of the system then configure the keyboard layout.


Networking
If you’re doing this from home then it’s likely you will have DHCP
enabled on your network which, in short, allows your machines to
automatically get IP addresses from the router. In this case you should
find you don’t have to configure the network; other networks can have DHCP enabled too. You can skip over this section to configuring the hostname if this is the case, as this is where you will land instead of the screen shown below.
If you don’t have DHCP and/or are using a static IP then continue with the steps below.
My network details are as follows (yours WILL differ):
IP address: 192.168.0.110
Subnet: 255.255.255.0
Gateway: 192.168.0.1
Name servers: 8.8.4.4 and 8.8.8.8 <- are="" different="" em="" google="" have="" may="" name="" ones.="" s="" servers.="" these="" you="">
Subnet: 255.255.255.0
Gateway: 192.168.0.1
Name servers: 8.8.4.4 and 8.8.8.8 <- are="" different="" em="" google="" have="" may="" name="" ones.="" s="" servers.="" these="" you="">

Choose the option to configure manually and enter your IP address.


Then enter your subnet, gateway and name server addresses.


Hostname & User account
The hostname
is the name that the machine will be identified as. You may want to use
something like web, mail, database, hosting, controller; anything you
want really can go here. If you’ve been given a hostname, use that.

Next enter your Full Name, Username and password; you’ll need to do this twice to confirm the password.
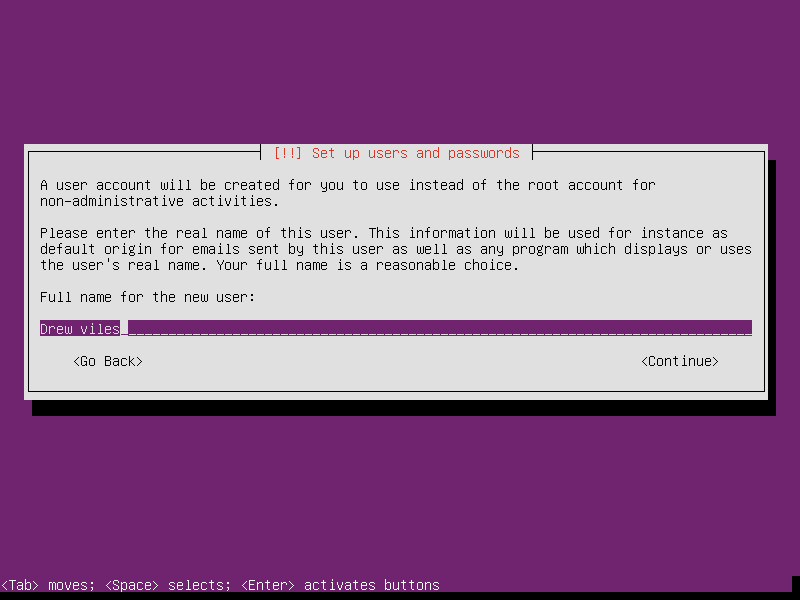
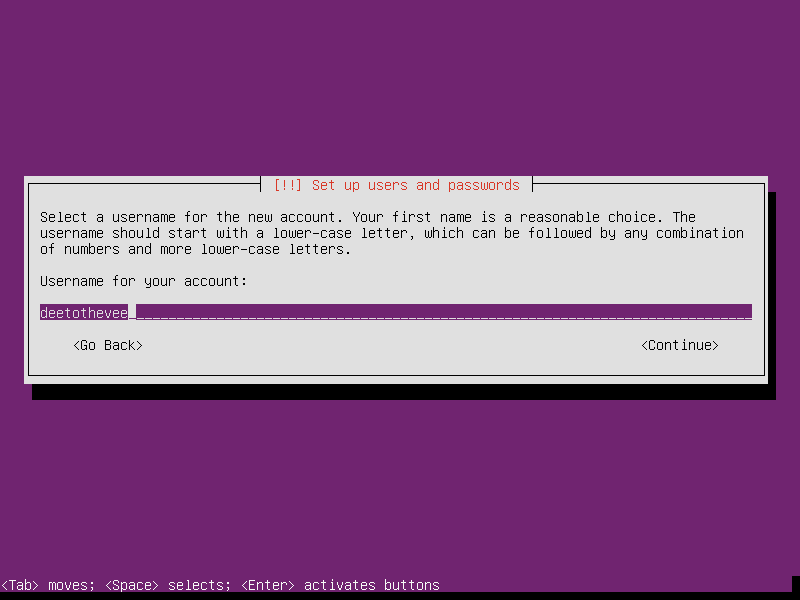


Check the timezone is correct and confirm with Yes. If it’s not click no and you’ll be prompted to select it from a list.

Disks — RAID — Preparation
This whole section on disks may seem daunting at first, but run through it a few times and it’ll become second nature.
You could use guided partitioning, but you came here to learn!
So select manual.

You should do the following steps on both disks until the Disks — Create /boot & LVM Device
section as we’ll be configuring them for RAID 1. RAID 1 (in particular)
requires the disks be exactly the same size so that it can work. If
you’re not using RAID you can skip over this to the Disks — Create /boot
section, though a small amount of work on your part will be required to
do this RAID-less as the guide will only hint at how you can do it
rather than show you as you go on.
Highlight the physical disk and press enter, agree to create the new partition table. This will allow you to start creating partitions.


Select the new FREE SPACE, press enter and then create a new partition.


You
need to create two partitions, the first of which should be “1 GB” in
size, the second should fill the rest of the space available. To achieve
this, just continue with the size that’s displayed so that it will fill
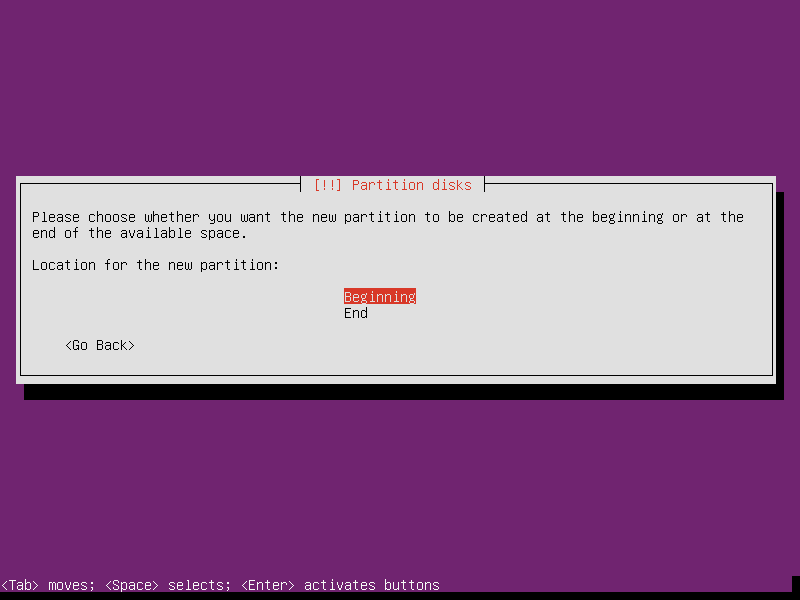
the disk. Alternatively you can type 100% to fill the remaining space. Always* set it to the type of primary and the location as the beginning.
Setting location to beginning will not set it to the start of the disk but to the start of the available free space.
Setting location to beginning will not set it to the start of the disk but to the start of the available free space.
*We
could use logical but since mid-2010, most systems started to use GPT
instead of MBR meaning we don’t really need it. Using logical with MBR
partitioning scheme allows us to have more than 4 partitions on a single
disk (which we don’t need in this guide anyway). GPT allows that as
standard, even when using primary you can have around 128 partitions.
Most systems are using this partitioning scheme now — see more on the benefits of GPT over MBR.


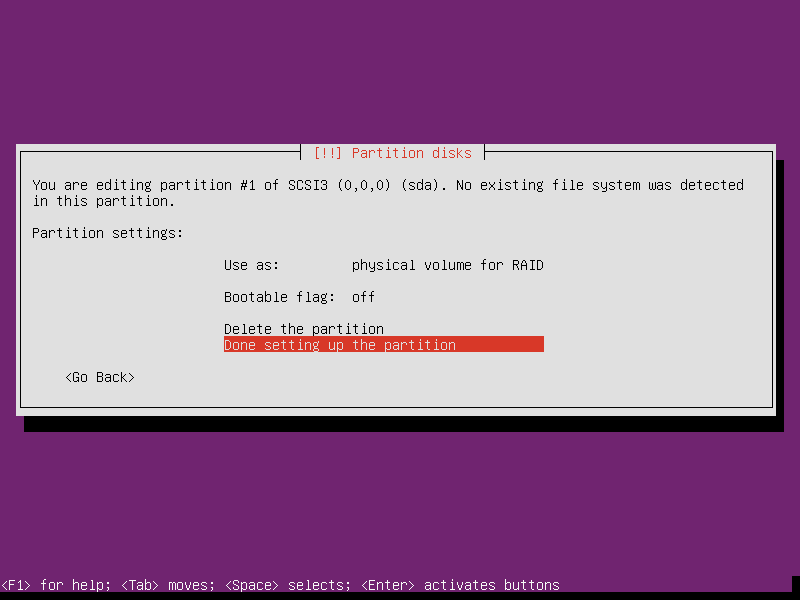
Highlight Use as, press enter and change it to Physical Volume for RAID. highlight and select Done setting up the partition.
Both disks should now be partitioned with 2 partitions that have been configured ready for software RAID.
Disks — RAID — Create
You should have something like the image on the left below. Next you’ll go ahead and configure the software RAID. Select Configure Software RAID, apply the changes as shown in the image on the right and you’re ready to go.


You need to create two MD (Multiple Device). One for the /boot sector and one for the LVM partition device. Follow the steps for both RAID partitions you created.
Create a new MD device and select RAID 1, then enter 2 for the active devices and 0 for the spares — spares are used when a drive in the RAID array fails.


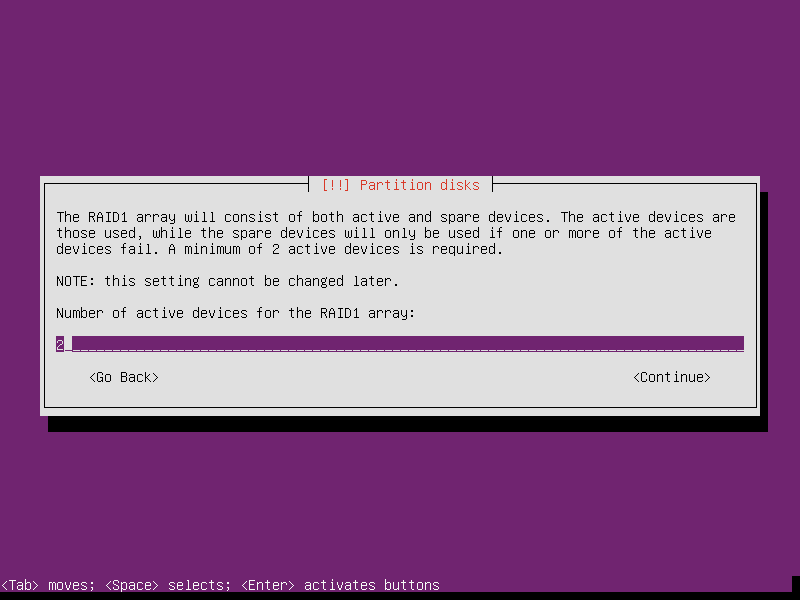

Next
select the RAID partitions to use. The first time around you’ll select
both of the 1GB partitions as shown in the images the second time around
you’ll select both of the larger partitions. When you’re done with
both, highlight and select finish.


Disks — Create /boot & LVM Device
You should have something that looks a little like the image below.
If
you’re not using RAID and have skipped to this section you’ll need to
create 2 partitions on the disk you’re using. One sized at 1GB and
another filling the rest of the disk space which you will assign as
below.

Select the new 1GB (998.2MB in the image) partition under Software RAID Device, set Use as to EXT4 and set the Mount point to /boot.

Next select the large partition under the second RAID Device and set Use as to physical volume for LVM

Disks — Create LVM
You’re
ready to start creating the LVM. The reason I’ve opted for this is
because I prefer it when it comes to extending disks. It makes it much
easier to add disks to systems and extend file systems without,
generally, any migration.
You
don’t have to use RAID or LVM however this is a setup that more closely
resembles a real world scenario (although hardware RAID is preferable).
If you opt not to use LVM, just set the large partition to EXT4 and the
Mount point of it to / in the previous step. You can change the type after you have set it as long as you don’t write the changes to disk.
Anyway, let’s configure the Volume Group for LVM.
Select Configure Logical Volume Manager, apply the changes if prompted then select Create volume group and enter a name for it — I’ve used vg00.


Highlight the larger MD and press space to select it, then continue.

Create the Logical Volume. Select Create logical volume and select the volume group you just created.
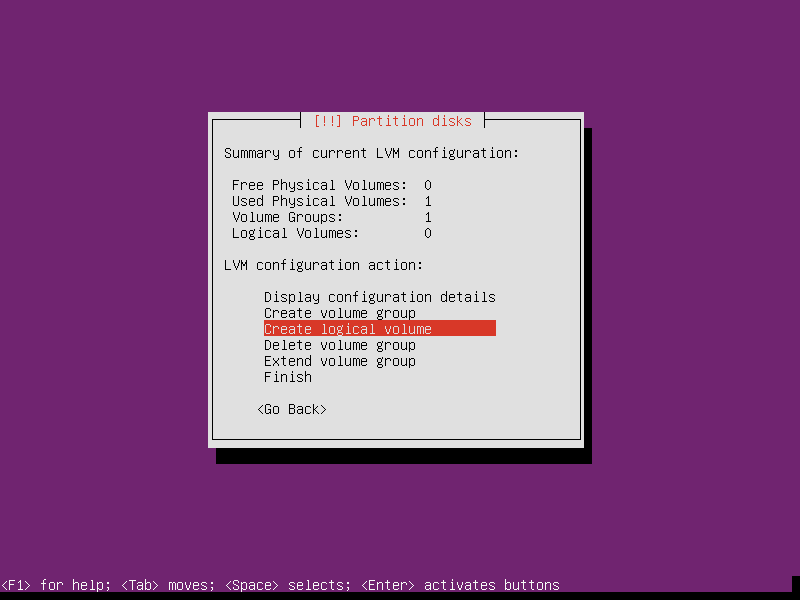

Now
you’ll name the logical volume and give it a size. You can create
multiple logical volumes here (one for /, /home, /var, /opt and more)
but you’ll create one big one by accepting the default size.
Name the logical volume and give it a size (or accept the default to fill space) then select finish.
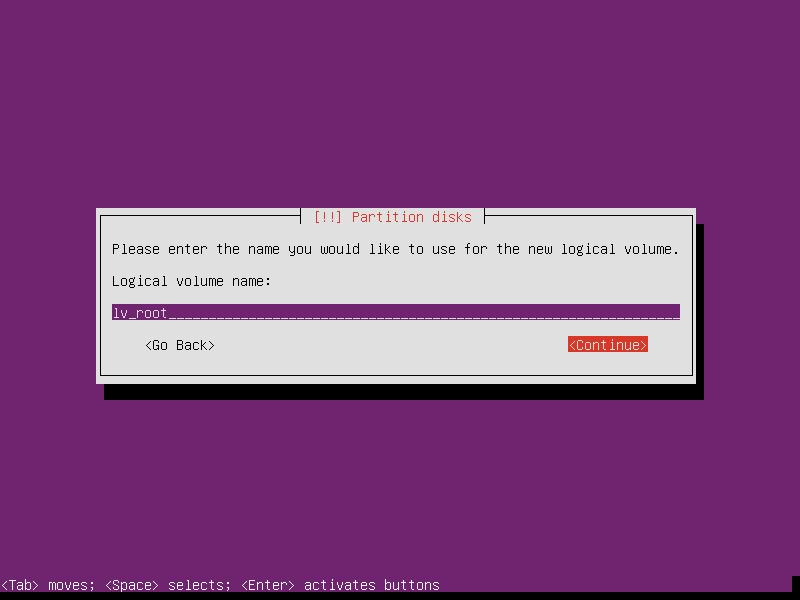


You’re nearly done with the disks! All that’s left to do is create the root (/) filesystem and you’re good to go.
See that new partition under LVM VG vg00? Select it and set Use as to ext4 and Mount Point to / then select done.

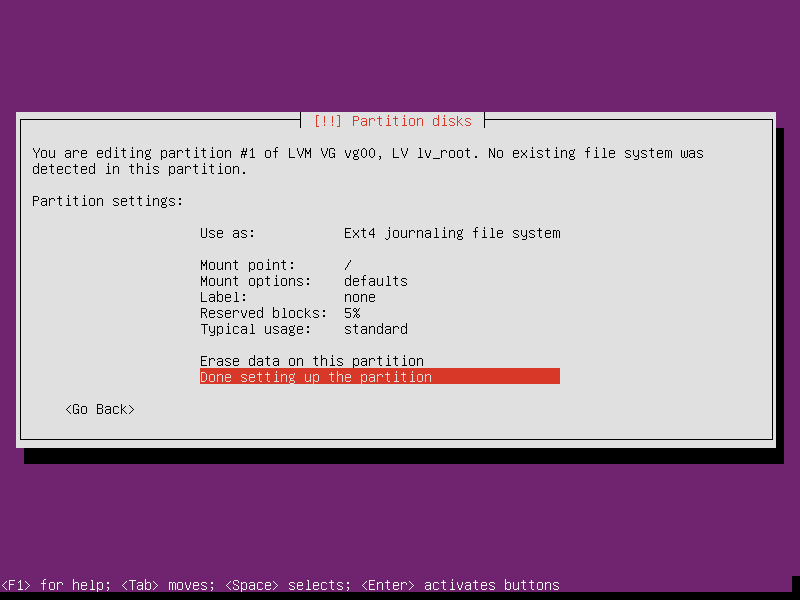
Apply all your lovely new partitions by selecting finish and accepting the note about changes being written.


You made it!
Now I know the disk configuration may seem complex and I’ve made it so because I want you to learn how much control you can have. Most guides will take you through only using a single disk and either creating everything in one partition or, if you’re lucky, breaking it down to /boot, / and swap* (boot, root and swap). Whilst that’s fine, it’s unlikely you’ll see this in a real world scenario other than perhaps in cloud setups since they have ways of providing some of the features gained by using RAID and LVM.
Now I know the disk configuration may seem complex and I’ve made it so because I want you to learn how much control you can have. Most guides will take you through only using a single disk and either creating everything in one partition or, if you’re lucky, breaking it down to /boot, / and swap* (boot, root and swap). Whilst that’s fine, it’s unlikely you’ll see this in a real world scenario other than perhaps in cloud setups since they have ways of providing some of the features gained by using RAID and LVM.
*Important note: You haven’t set any swap space up here. This is because this is part of my Kubernetes tutorial series which
requires swap to be disabled. If you’re NOT following the Kubernetes
guide then it is recommended you configure swap space. You should delete
the partitions you’ve created so far and create the swap in the same
way you did the /boot sector (you’ll see it as an option in “Use as”
when configuring the partition) and it should generally be 2 x your RAM
amount. Create it after /boot and before the large space (this doesn’t
matter but makes life easier later when resizing).
Configuring packages
If
you are sat behind a proxy server, enter the details here. If you don’t
know what this is, just leave it blank and click continue.
Accept auto updates if you choose — I personally prefer to manually apply updates for testing and stability reasons.
Think about it this way, what if you have a database or web server that gets auto updates and it happens during your busiest time? It’s entirely possible the services will be stopped during the upgrade and this will cause some downtime.
Worse still, what if an update comes through, breaks one of the services and stops it from running?


Next
you’ll select some packages. You could select them all, however for the
purposes of this tutorial just select the OpenSSH server. Highlight it
and press space, then continue onwards.
Final stages
Once
the packages have been installed you should be prompted to install the
GRUB boot loader (if not it has likely auto-installed). Select yes to
install GRUB and if prompted, select the first disk your machine boots.
Once you’ve done that, you’ll be prompted to reboot.


Log in and updates
You’re
officially done however for the sake of completion, lets log in. Once
it has rebooted you should see the screen below, enter your username and
press enter. You’ll then be prompted for the password you set during
install.
When you type the password, it will not show on screen but don’t worry, it is being entered.Press enter when done and you’ll see a load of text outputted, this is the message of the day, and a flashing cursor next to ~$
When you type the password, it will not show on screen but don’t worry, it is being entered.Press enter when done and you’ll see a load of text outputted, this is the message of the day, and a flashing cursor next to ~$
Welcome to the shell.

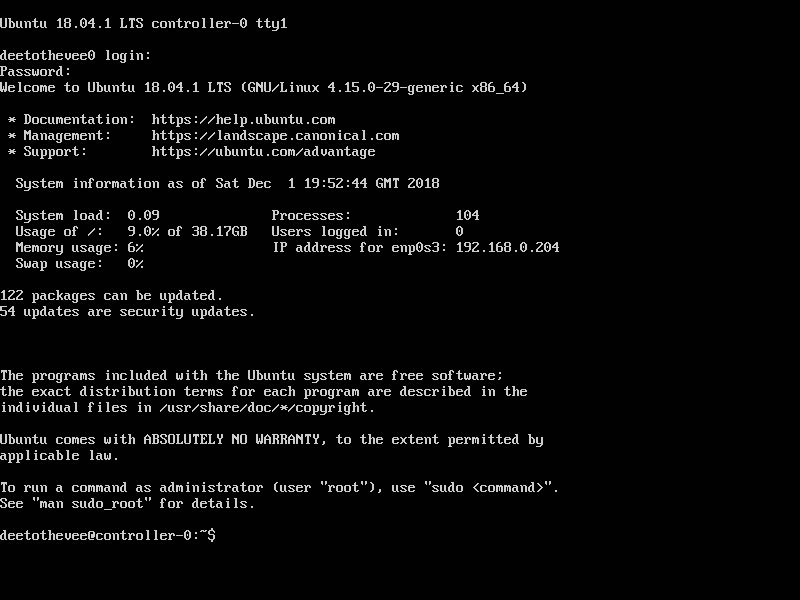
Once logged in you can start running commands. Here are the commands to update Ubuntu.
sudo apt update — This will refresh the package list allowing the system to see if any updates or new packages are available.sudo apt upgrade -y
— This will upgrade all of the packages that can be upgraded. Remove -y
if you want to see the packages will be upgraded and be prompted for Y or N to continue or cancel.
Sudo is used to run commands with escalated privileges. If you run the commands above without sudo, they will fail.

Your system is now up-to-date.
SSH access
You
can already connect to the server via SSH as we installed the package
during install. If you’re on a VM with NAT you may need to create some
forwarding rules to make the blow work.
All
you need is the IP address of the VM, your username and your password.
If you’re on Linux or Mac, you can ssh straight from the terminal:
There are a million and one tutorials online that will show you how to achieve this so I won’t be getting into it any more than that today.
ssh username@ipaddress. If on Windows, there are many options but putty is the most common.There are a million and one tutorials online that will show you how to achieve this so I won’t be getting into it any more than that today.
Conclusion
You’re done!
What you’ve learned:
- How to install Ubuntu Server
- How to configure a static IP during installation
- How to configure RAID
- How to configure LVM
- How to log in and update the system
- Basic SSH access
Go make yourself a cup of tea and relax.
Комментариев нет:
Отправить комментарий